Cursive Writing Made Easy: Mastering Alphabets in Cursive
Helping children learn cursive writing doesn’t need to be confusing or time-consuming. Alphabets in Cursive is a practical resource hub built for parents, teachers, and homeschoolers who want clear, structured materials for teaching cursive handwriting step by step.
Here you’ll find printable worksheets, guided practice materials, and simple tools designed to support real learning — at home or in the classroom.
What is Cursive Writing?
Cursive writing is a unique form of handwriting where the letters of each word are joined together in a flowing, continuous motion. Unlike print writing, where each letter is separated, cursive allows for faster writing by keeping the pen on the paper throughout each word.
This writing style has been used for centuries to improve writing speed, efficiency, and fluidity. It is often introduced in schools to help students develop better handwriting skills while fostering a deeper connection between the brain and hand.
Why Parents & Teachers Use This Resource Hub
Most cursive resources online are either too advanced, poorly structured, or made for search engines instead of learners. This site focuses on usability and teaching flow, not filler content.
Parents and teachers use this hub because it helps them:
- Teach cursive in a clear, logical order
- Save time planning handwriting practice
- Support children who struggle with letter formation
- Access free, printable practice materials
- Reinforce learning through consistent practice
Everything here is designed to be easy to use, even if you’re teaching cursive for the first time.
How Cursive Is Taught Here
Cursive writing works best when it’s taught in small, manageable steps. This hub follows a simple learning sequence that parents and teachers can apply immediately:
1. Gather Your Tools
You don’t need fancy equipment to start. A good pen or pencil and lined paper will do. Lined paper helps keep your letters the right size and evenly spaced.
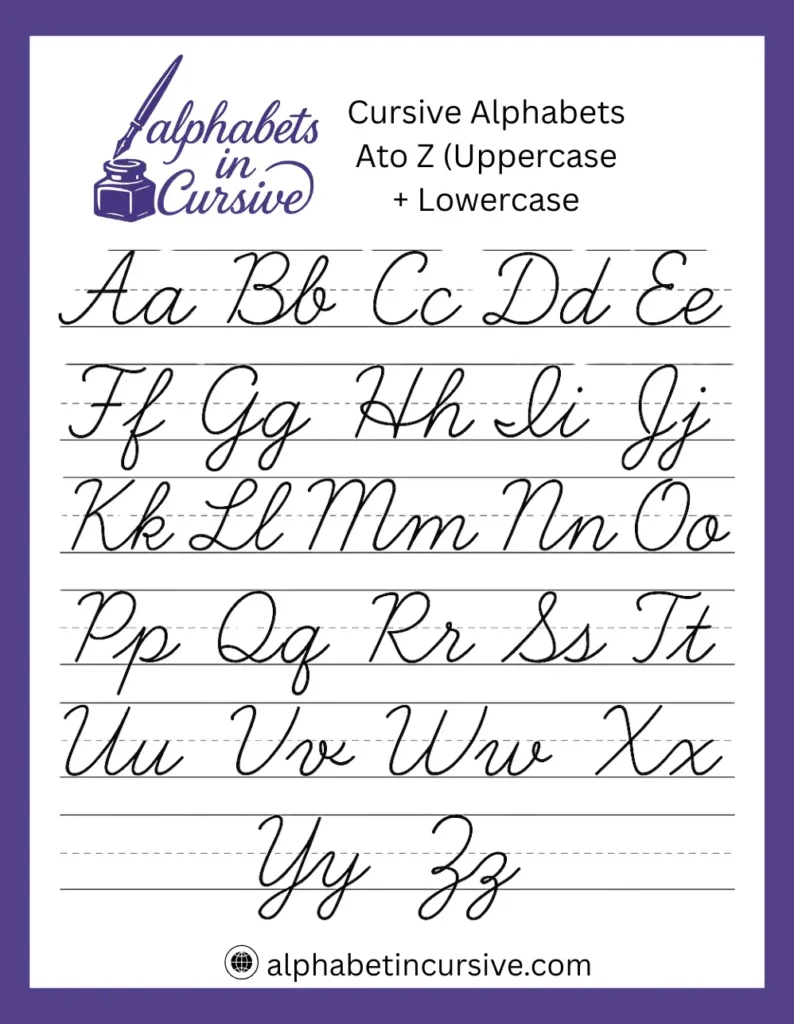
2. Learn Lowercase Letters First
Begin with lowercase letters. These are easier to connect. Letters like a, c, e, o all have simple shapes and are great starting points.
4. Use Tracing Worksheets
You can find many free cursive tracing worksheets online. Trace over the letters with your pen, then try writing them on your own.
5. Connect Letters to Form Words
Once you’re comfortable with individual letters, start joining them. Practice words like cat, dog, sun. Focus on smooth connections between letters.
6. Move to Uppercase Letters
Start learning uppercase cursive letters. These letters often have more loops and flourishes, but with practice, they become easier to write.
8. Practice Regularly
Consistency is key. Even 10 to 15 minutes of daily practice makes a big difference. Over time, your writing will become smoother, faster, and more natural.
Each stage is supported with focused worksheets and examples, allowing children to build confidence gradually instead of feeling overwhelmed.
Different Types of Cursive Writing Styles
Cursive isn’t one-size-fits-all. Several styles are used around the world, each with its own look and flow. Knowing the differences can help you choose the best one for your needs.
| Cursive Style | Characteristics |
|---|---|
| Zaner-Bloser | It features simple, round letters and a slight slant. It’s easy to read and a great choice for beginners. |
| D’Nealian | D’Nealian bridges the gap between print and cursive. Letters have small tails that prepare students for cursive connections. |
| Spencerian | Spencerian cursive is elegant and flowing. It features long loops and fancy strokes, making it more decorative. |
| Palmer Method | Palmer Method focuses on muscle movement and rhythm rather than detail. It’s good for fast, everyday writing. |
| Modern Cursive | Modern cursive mixes traditional forms with personal style. It may be less formal but more natural. |
How to Teach Cursive Writing to Kids
Teaching kids how to write in cursive works best when it’s broken into fun, manageable steps. Here’s how to make it stick.
Start with Simple Strokes
Use play-based methods to teach basic shapes. Let kids trace curves, loops, and lines using pencils, crayons, or even their finger in sand or shaving cream.
Introduce Letters in Groups
Teach similar-looking letters together—like c, a, d—so kids spot patterns. This builds memory and cuts confusion and makes easy to learn cursive writing.
Keep Practice Sessions Short
Ten minutes of focused writing is better than 30 minutes of frustration. Use lined worksheets to support shape and size.
Celebrate Progress
Praise neat letters, even if they’re not perfect. Confidence boosts learning. Try using sticker charts or letting kids write their name in cursive on special projects.
Add Fun Activities
Turn learning into games—match letters, copy short words, or use dry erase boards. The more fun it feels, the more likely kids will stay engaged.
Be Patient
Some children take time to build the muscle control needed for cursive. Progress will come with time and gentle guidance.
Explore Our Cursive Writing Resources
Our website offers practical tools and pages to make learning cursive easy and enjoyable. Here’s a quick look at what you can use right now:
Who This Site Is Designed For
- Parents helping children practice cursive writing at home
- Teachers looking for ready-to-use handwriting materials
- Homeschoolers building structured literacy routines
- Students who need extra practice to improve handwriting confidence
All materials are created with real learning environments in mind, not automated content generation.
If you’re new to teaching cursive, start with the cursive alphabet worksheets and practice one or two letters at a time. For regular improvement, short daily practice sessions are far more effective than long, infrequent ones.