Cursive Alphabet: Letter L Worksheet and Practice Methods
The cursive letter L is one of the tallest letters in the alphabet. It starts with a high loop and drops straight down, making it easy to spot in words like “look,” “light,” and “love.” It’s one of the first tall letters students learn, and it plays an important role in shaping proper letter height and spacing.
Writing cursive L teaches balance between curves and straight lines. The lowercase version is simple and smooth. The uppercase version looks a lot like a large loop and is often used in names or titles.
Let’s begin with a free worksheet made to help you learn it with confidence.
Download Free Printable Cursive L Worksheet?
A good cursive worksheet helps you build the right motion, size, and shape from the beginning. This printable cursive L worksheet includes all the tools you need to learn both uppercase and lowercase L with accuracy.
How to Write the Cursive Letter L
Cursive L is tall and smooth. It doesn’t have sharp turns or tight loops, so it’s often taught early when learning cursive. It’s one of the easiest tall letters to learn, which makes it a good building block for other letters that rise above the midline.
Let’s break down each form.
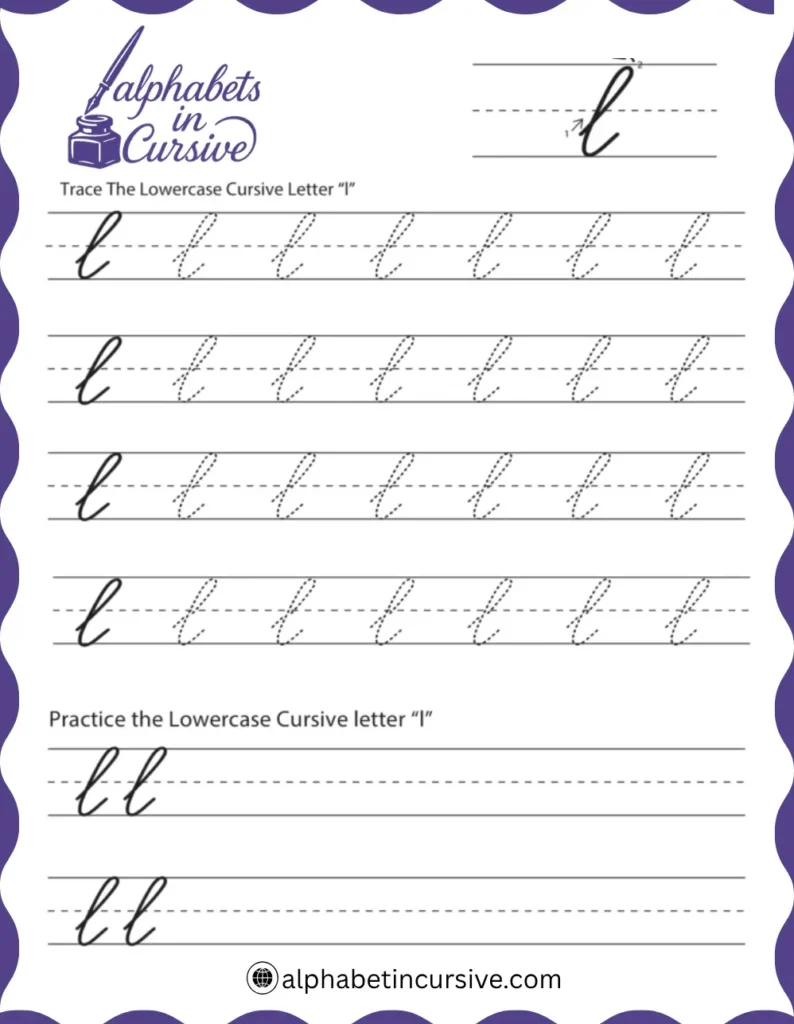
How to Write Lowercase Cursive L
Lowercase cursive l is one of the easiest tall letters. It rises above the midline but uses just one continuous stroke.
Step-by-step:
- Place your pencil on the bottom line
- Draw a straight line upward to the top line
- Curve slightly left at the top to begin a narrow loop
- Pull your stroke straight back down on the same path
- Finish with a small rightward curve that moves into the next letter
Practice tip:
Think of it as a tall, narrow loop like a candy cane without the hook.
What to watch:
- Don’t lean it too far forward or backward
- Keep your upstroke and downstroke on the same line
- Make the loop tall, not wide
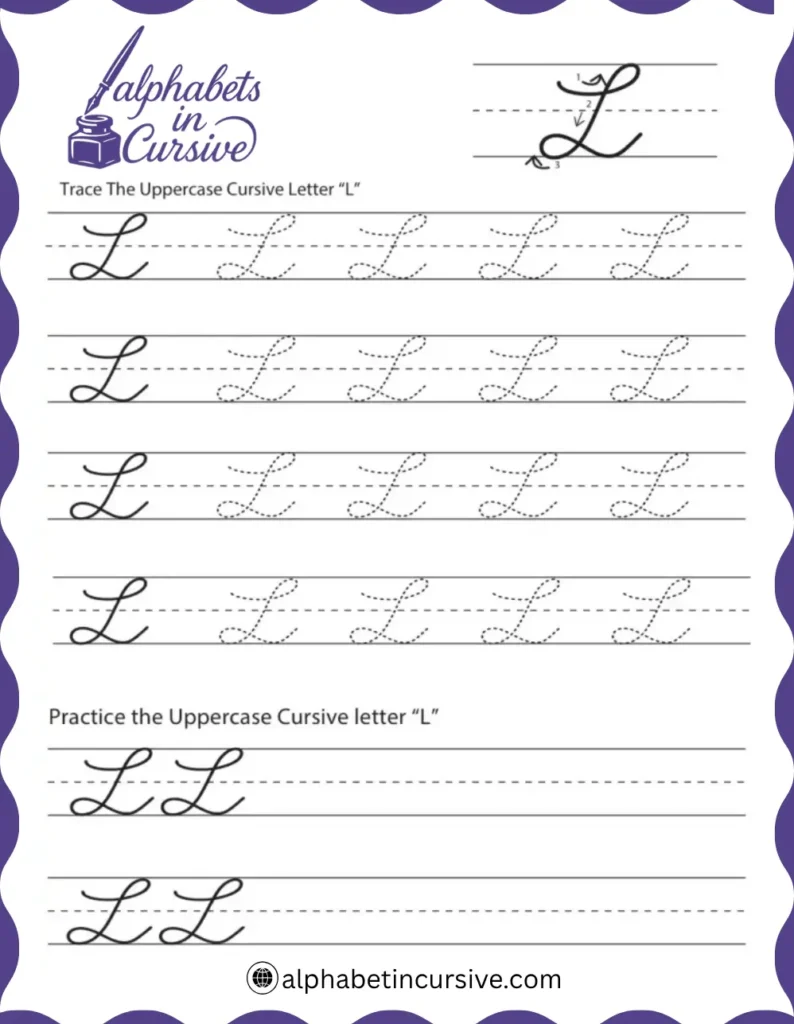
How to Write Uppercase Cursive L
Uppercase cursive L is rounder and more stylized. It begins low and sweeps up into a wide curve before finishing with a soft hook.
Step-by-step:
- Start slightly above the bottom line
- Swing your pencil upward toward the top line in a wide curve
- Reach the top and swing back down with a curve on the left side
- As you near the bottom, turn the line slightly right into a loop
- End with a gentle tail that points right, ready for connection if needed
Practice tip:
Picture the top of a long umbrella. The whole shape should feel balanced — not too narrow or too flat.
What to avoid:
- Skipping the initial swing will make it look like a lowercase L
- A too-tight loop at the bottom can make it look like an e or b
- If the tail is too long, it won’t fit well in words
How to Connect Cursive L to Other Letters
Cursive L is tall and ends with a smooth exit stroke, which makes it one of the easiest letters to connect. The lowercase form connects from the bottom right, while uppercase L often stands alone but can link to other letters in some styles.
How to Connect Lowercase Cursive L
The lowercase cursive l ends with a small curve to the right. This final stroke helps link it naturally to letters that follow.
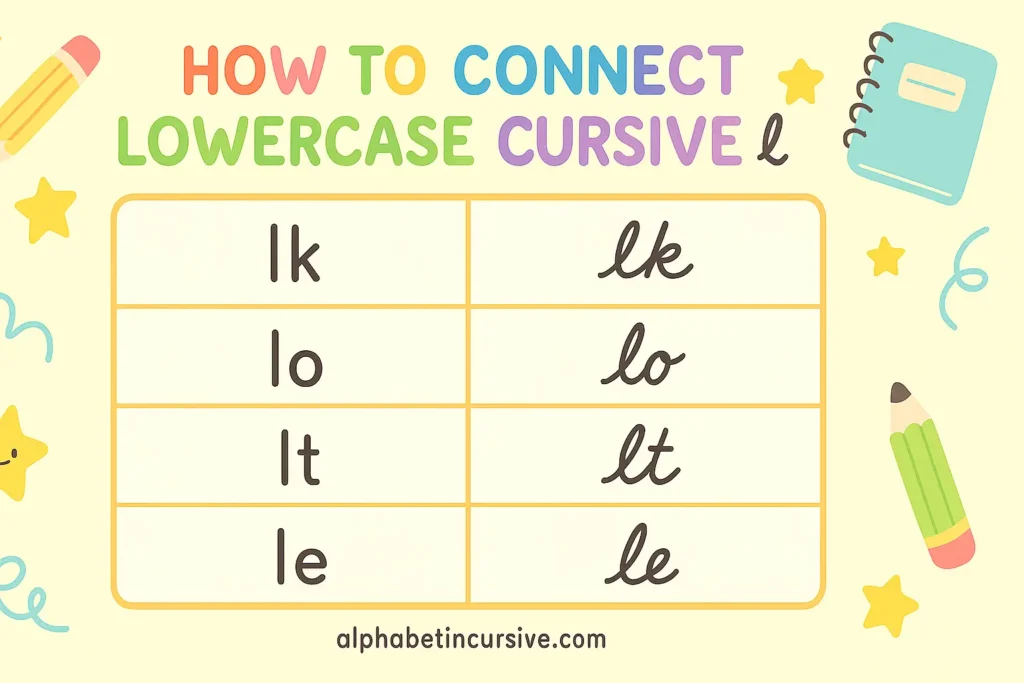
Connecting “l” to Different Letter Types
- To short round letters (like a, e, o): The exit stroke flows directly into the top of the next letter’s curve.
- To tall letters (like t, h, k): Keep the exit stroke narrow so you have space to rise up again.
- To letters with loops (like b, f): Aim the exit slightly upward before curving back down into the next stroke.
How to Connect Uppercase Cursive L
Uppercase cursive L is large and sweeping. Most of the time, it’s written as a stand-alone letter, especially at the start of names. But it can connect when needed if the final stroke finishes near the midline.
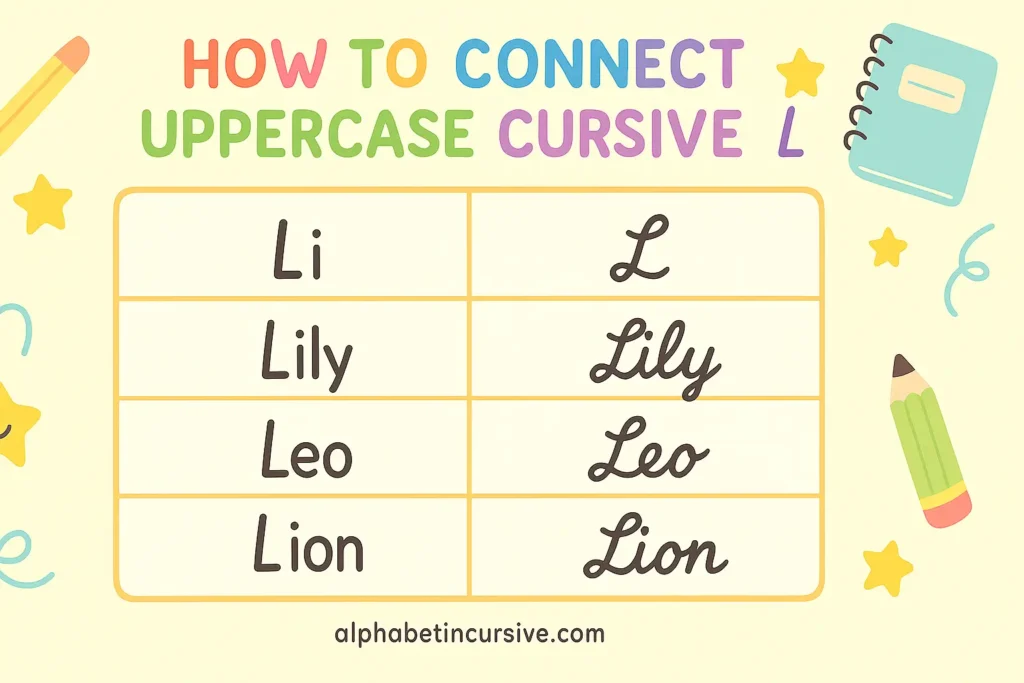
Connecting “L” to Different Letter Types
- To round letters like a or o: If your L ends with a curved tail, you can guide that into the next letter’s loop.
- To tall letters like t or h: Lift your pencil and start the next letter separately, unless your L ends with a tight exit line.
- To small letters like i or e: The soft hook at the end of L can curve directly into them, but keep it short.
Practice Methods for Writing Cursive L
Cursive L may look simple, but practicing it the right way helps build consistency and clean letter spacing. These methods work well for both beginners and students who need extra control.
Each step focuses on one key part of the writing process.
1. Start with Guided Tracing
Begin by tracing large cursive L letters. This helps your hand learn the shape without worrying about size or speed. Focus on keeping the loop narrow and the stroke tall.
2. Practice with Dotted Outlines
Once you can trace easily, move to dotted outlines without arrows. These help you remember the strokes on your own. Fill one row with lowercase Ls and one row with capitals.
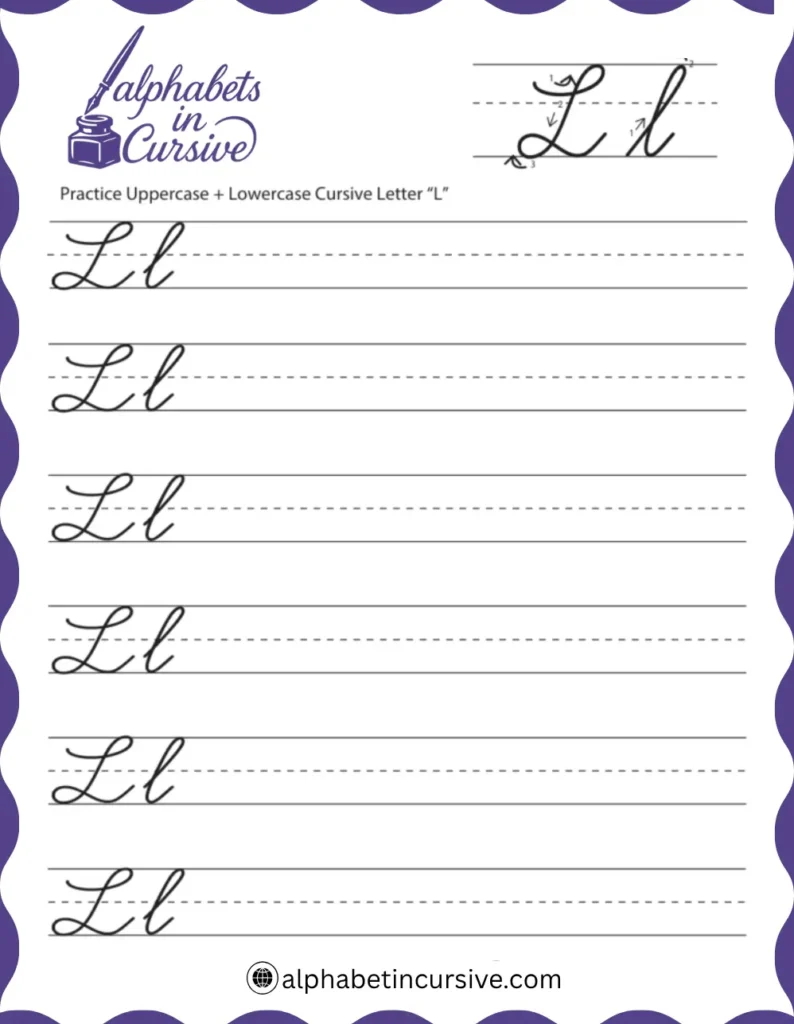
3. Write on Blank Lines
When you’re ready, try writing cursive L without guides. Use ruled paper. Start with lowercase Ls, then write uppercase ones. Check each letter to see if it’s straight, tall, and smooth.
4. Connect Letters in Pairs
Use simple letter pairs to practice linking l to other letters. This helps improve spacing and rhythm.
Try these:
- la, le, li, lo, lu
- al, il, ol, el
- Lily, Lola, Liam
Repeat each pair or word across the line. If one looks uneven, write it again more slowly.
Frequently Asked Questions
How do I write a lowercase cursive l?
Start at the bottom line, draw a straight line upward to the top, then loop slightly and follow the same line back down. End with a small rightward stroke for linking.
Does uppercase cursive L connect to other letters?
It can, but it doesn’t have to. Many people lift their pencil after writing uppercase L, especially in names. If you do connect, make sure the ending stroke curves gently into the next letter.
What’s the most common mistake with cursive L?
The loop being too wide or the stroke leaning too much. Keep your lines straight, your loop narrow, and your upstroke and downstroke close together.
2 Comments